E16 | Stair Treads, Sconce Install | Ask This Old House
Season 23 Episode 16 | 23m 42sVideo has Closed Captions
Mauro paints stair treads; the team highlights some tools; Heath installs wall sconces.
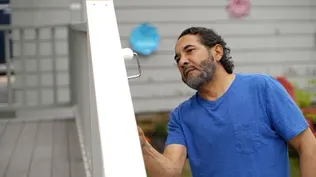
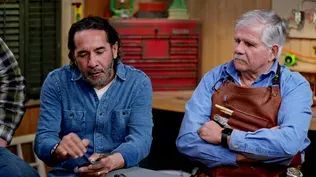
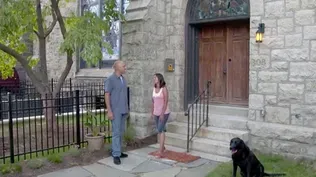
Mauro Henrique shows a homeowner the right technique and materials to paint his unfinished wood stair treads and handrail; the team shares a few new tools they've been using lately- a scribe tool, electronic earmuffs, and a standing sod cutter; Heath Eastman installs new wall sconces above a fireplace that had originally had them but were covered up by the previous owner.
Funding for THIS OLD HOUSE is provided by The Home Depot and Renewal By Andersen.
Support provided by:

E16 | Stair Treads, Sconce Install | Ask This Old House
Season 23 Episode 16 | 23m 42sVideo has Closed Captions
Mauro Henrique shows a homeowner the right technique and materials to paint his unfinished wood stair treads and handrail; the team shares a few new tools they've been using lately- a scribe tool, electronic earmuffs, and a standing sod cutter; Heath Eastman installs new wall sconces above a fireplace that had originally had them but were covered up by the previous owner.
How to Watch Ask This Old House
Ask This Old House is available to stream on pbs.org and the free PBS App, available on iPhone, Apple TV, Android TV, Android smartphones, Amazon Fire TV, Amazon Fire Tablet, Roku, Samsung Smart TV, and Vizio.
Keep Exploring


This Old House Insider Newsletter
Get This Old House exclusive stories, tips, and behind-the-scenes information delivered right to your inbox every month.Providing Support for PBS.org
Learn Moreabout PBS online sponsorship♪♪ Kevin: On "Ask This Old House," our experts travel across the country to answer questions about your house.
♪♪ Today, do your stairs need a refresh?
Mauro shows a homeowner how a fresh coat of paint can elevate the look.
Then we hear about some new tools our team is using in the field.
Mark: They are easy to use.
There's a little knob on there, Kevin.
Kevin: And Heath helps a homeowner install a set of sconces.
Kevin #2: Can it go up a little bit higher?
Kevin: All that on "Ask This Old House."
♪♪ Alex: Mauro.
Mauro: Alex.
Alex: Yes, sir.
How are you doing this morning?
Mauro: Very good.
Nice to meet you.
Alex: Nice to meet you.
Thank you for coming out.
So, you know, these are the stairs I wrote in about.
Mauro: I recognize that from the picture.
Alex: Absolutely.
You know, my wife and I, we just bought this house about six months ago.
I have two big dogs.
One's 110.
One's 75.
Mauro: Wow.
Alex: So big boys, love them to death, but you can kind of see they're scratching up the wood right now, so... Mauro: Yeah, I can see some scratch right there on the steps.
Alex: Long term, we want to put a seagrass runner on it.
Mauro: Okay.
So you're going to have a runner going up.
Alex: Long term, yes.
Mauro: Alright.
Alex: You know, I painted the trim on the stairs themselves.
Mauro: Okay.
Alex: But I'm really not sure how to paint the stairs.
Mauro: Alright.
Well, the paint that we use for the floors and steps is different from the paint that we're going to use for the handrails and the newel post.
Alex: Okay.
Mauro: What color do you think that you're going to use here?
Alex: My wife and I were thinking white.
Mauro: Okay.
You want to keep all whites like everything else around the house here?
Alex: Yep, nice and clean.
Mauro: Alright.
That looks good.
What kind of a sheen would you like for the steps?
Alex: I was thinking of like a high gloss.
Mauro: A high gloss?
Alex: Because I believe gloss is pretty easy to clean?
Mauro: It's easy to clean.
Alex: Perfect.
Mauro: Especially on the steps that's had a lot of traffic up and down.
It will look nice and is scuff-resistant.
It'll be good to go.
Alex: Perfect.
Mauro: Alight, I'm gonna step out, grab some stuff.
We're gonna do some prep work.
Alex: I love it.
Thank you.
Mauro: Alright.
I'll be right back.
♪♪ Alright, Alex, now it's time for the prep work.
We're gonna use a 220-grit sandpaper for the handrails and newel post.
Alex: Okay.
And what's the benefit of sanding?
Mauro: Well, sanding is going to get us two very important things.
We're going to clean up, and also we're going to open up the grain so the primer can get a very good grip.
Alex: Okay.
So better adhesion long term.
Mauro: Better adhesion.
Alex: Perfect.
Mauro: Alright?
Well, a little bit more right here.
Alex: Right there?
Mauro: A little.
Alex: Oh, yeah.
Mauro: Alright, Alex, what I'd like for you to do -- just break the edges over here at the bottom and top, okay?
Alex: Okay.
Mauro: Make sure it's nice and smooth all the way down from there to here.
Alex: Perfect.
Mauro: And then I'll start from the top to bottom.
We're going to do 120, and then the second round we're going to do 220.
Alex: Okay.
[ Sander whirring ] Let's do 220.
You do the edges again like you did the first time.
And I'll start from the top again.
Alex: Let's do it.
[ Sander whirring ] Mauro: Well, now it's time to vacuum all the steps.
[ Vacuum whirring ] Let's protect the floors because, um, all the steps are sanded nice and clean and we do not want to see any drop of primer here right now.
Alex: Absolutely.
Mauro: Alright.
Time to do the priming.
Alex: Let's do it.
Mauro: Okay.
Let's do this.
So, we're going to start with the handrails, alright?
Always from top to bottom.
Alex: Okay.
Mauro: You're going to do the top.
And then you do the bottom.
And then lately we do the steps.
Alex: Okay.
Mauro: And we're going to do an oil-base primer.
Alex: Okay.
Mauro: Because you get better adhesion for the type of wood that we have and for the stairs that's going to be foot traffic all the time.
When you work with oil-based paints or primers, the best way to clean your tools, your brushes is paint thinner.
Okay?
That takes care of that.
If you're working with a water-based paint, warm water, a little soap.
That takes care of that, too.
So... Alex: Okay.
Mauro: And also this primer dries in about one hour and we can start painting it.
Alex: Oh, awesome.
Mauro: It's a very fast-dry primer.
Alex, primer is dry.
Alex: Awesome.
Mauro: You know what time it is?
Alex: Painting time?
Mauro: Prep first, alright?
Alex: Oh.
Mauro: We're gonna lightly sand everything like we did the first time.
Alex: Okay.
Mauro: And then we're going to vacuum.
And then we're going to lay down the first coat of paint.
Alex: Cool.
Mauro: Alright?
Sanding between coats allows for the paint to better adhere to the surface.
♪♪ Alright, let's go.
Alex: Let's do it.
Mauro: Alright, we're gonna do the handrails again.
But now we're doing the paint.
Alex: Okay.
Mauro: We're going to use this very durable and tough paint specifically for handrails and newel posts and also good for trim in general -- doors, baseboards, door trim and everything.
Alex: Okay.
Mauro: Alright?
Alex: So high traffic.
Mauro: High-traffic areas because you guys are going to be rubbing hands all the time.
And this paint will take care of that.
Alex: Perfect.
♪♪ Looks amazing.
Mauro: Look there.
Great.
Great coverage.
You start to see a little bit of a sheen.
When it dries, it pops even more.
But yeah, that looks pretty nice.
Okay, it's time to paint the treads with the floor paint this time.
Alex: Okay.
Mauro: We're going to do the same way that we did the first time.
I will do the treads from the top to bottom if you want to go ahead and start the outside edges and underneath.
And we meet down here.
Alex: I like it.
Mauro: Okay.
Let's get it done.
And to paint the treads we're just going to use this brush this time.
It's going to be brush stroke.
♪♪ Because it's going to give us a nice even and a much thicker for the first coat.
Alex: Okay.
So you want a thick first coat for... Mauro: Yes.
Alex: ...durability?
Mauro: It's going to give us like a nice even finish.
Alex: Okay.
♪♪ Mauro: Alright, Alex, the first coat is done on the handrails and on the stairs.
First coat is dry, but it's not cured yet.
So before you put the second and final coat tomorrow, just lightly sand, vacuum, and get the work done.
Alright?
If you need to go up tonight, make sure you get some socks on.
Alex: Okay.
Mauro: And keep the dogs away for tonight.
Alex: Okay.
Mauro: Tomorrow should be fine, but today it's still not there yet.
Alex: Perfect.
Mauro: Alright?
Alex: Thank you so much.
This was amazing.
♪♪ ♪♪ Kevin: Hey, fellas.
Nathan: Hey, Kevin.
Lee: Hey, Kevin.
Mark: What's up, Kevin?
Kevin: We're doing some tool talk, the favorite things in your guys' bags these days.
Who wants to start?
Nathan: I'll start.
I got a new one.
It's a simple little scribe tool, and it's got three really good features to it.
The first one is it has these little offsets, 1/16th all the way to a half inch.
So I can just lay it on a piece of stock, draw a straight line.
Kevin: And when are you doing that?
Nathan: I like this the most when I'm trimming outdoors.
I can set a 1/4-inch reveal on the jamb and run my trim right against it consistent.
Second feature has a center finder, so I can set the pencil in like that.
I bring it to my material, turn it.
Automatically going to find center.
Lee: That's nice.
Kevin: Look at that.
And wait.
So by just turning it it adjusts the kind of the thickness of the material?
Nathan: Correct.
So bring in some 3/4, turn it.
Lee: Still finding it.
Kevin: No kidding.
Mark: Nice.
Nathan: Dead center on it.
Kevin: A lot easier than putting your tape on there and doing the math and all of that.
Nathan: Yep.
Takes all the guesswork out.
Final thing I like -- magnet on the back so I can hang it up in my truck or I can keep it in my belt.
I can find drywall screws behind the joint compound.
Kevin: Very nice.
Easy to find, hard to find, expensive, like...?
Nathan: Easy to find, inexpensive, and very accurate.
Kevin: Very nice.
Mark: Nice, nice.
Kevin: That's a good one.
Alright.
Mark, what about you?
Mark: Alright.
You guys are going to love these.
So, these are electronic earmuffs.
And they actually cancel out loud sounds.
But they give you the ability to keep a conversation going, which for me is the safety aspect of it.
So they are easy to use.
There's a little knob on there, Kevin.
Kevin: Right.
Mark: Yep.
Kevin: So if I've got them on... ...and I turn that on.
Oh, look at that.
Microphone.
Mark: Right.
Kevin: How you doing?
Lee: How you doing?
Kevin: [ Laughs ] Doing good.
But then if I'm just talking -- [ Claps hands ] Mark: Boom.
Lee: Shuts right off.
Kevin: Shuts it right down.
Nathan: Nice.
Kevin: Wow.
That's actually great, huh?
Good for you and all the safety stuff.
Mark: Exactly.
Kevin: Very nice, Mark.
I like that.
Alright, Lee, how about you?
Lee: Okay.
Put -- Laying down sod, so I've got a... Kevin: Sod cutter, huh?
Lee: Used to have saws like this on your knees.
Kevin: Did you take that from Nathan's bag?
Lee: I did.
Kevin: You guys use that.
Nathan: That's my job saw right there.
Lee: There you go.
Kevin: Drywall.
Lee: A drywall one.
Kevin: So you're using this down to cut the sod, trim it around?
Lee: Correct.
But you're down on your knees.
You know what I mean?
And then you have a box cutter, down on your knees.
Kevin: Same idea.
Lee: Yep.
Kevin: You guys score it, keep going through.
So what do you prefer?
Lee: I like these.
Kevin: Look at those.
Lee: Stand up, so I got... Kevin: You're getting smart, huh?
So you get to work from up here.
Lee: Correct.
Kevin: Without bending down.
Lee: Yes.
Kevin: And then -- Lee: And it's fast.
Kevin: You're literally -- Just like scissors.
Lee: Get your sod down and cut it out.
Kevin: That's pretty good.
Lee: Yeah.
Kevin: Ca-caw!
Ca-caw!
[ Laughter ] Like that.
Good deal, guys.
Thank you.
I think people are going to be very excited to know about that stuff.
Mark: Yeah.
Absolutely.
Nathan: Can I borrow those?
Mark: Sure.
Nathan: Thank you.
Mark: Right off the bat.
Yeah.
♪♪ Kevin: Heath.
Heath: Hey, Kevin.
Nice to meet you finally.
Heath: Nice to meet you.
Kevin: Thanks for coming out.
Heath: Absolutely.
Kevin: Appreciate it.
Heath: We got your e-mail, and it sounds like you wrote in about some issues with living room lighting.
You want to tell me a little about what you have going on?
Kevin: Well, as you might be able to see, it's a little dark in here.
And all we have for lighting is all of these floor lamps, which we've been working with this wireless switch.
Heath: I got you.
Yeah.
So it's not a bad solution.
So you have a wireless switch, and you can just mount it straight to the wall and then do a little plug-in module wherever you want to control the lamps.
Kevin: Exactly.
Heath: Gets you something.
Kevin: Yeah.
Heath: But not exactly what you're hoping for?
Kevin: No, no.
Heath: Okay.
Kevin: And in visiting some of my neighbors' houses, which are very similar, I noticed that a lot of them have sconces over their fireplaces here.
Heath: Okay.
So houses built around the same time, similar design?
Kevin: Exactly.
Heath: Those have sconces?
Kevin: Yeah.
If you look, I think you'll be able to notice.
Heath: Yeah.
You can.
It looks like you have two sconces or two boxes buried, anyway, that they just plastered in about evenly spaced on the fireplace, so it would make sense.
Kevin: The other thing that sort of gave us an indication of that was there's a switch over here that does nothing.
Heath: Okay.
And does that switch in your neighbor's house control the lights?
Kevin: Yes.
So we thought maybe that was what was removed from the wall.
Heath: Hopefully it's exactly what you had.
So let's start by taking a look at the switches.
If you want to go downstairs and turn the power off, I'll go over here and start taking this apart.
Alright.
So now we'll take the tester and just make sure everything is actually off and we don't have multiple circuits in this box by any chance.
That looks pretty good.
So now we'll take that switch out and see what we have going on.
[ Drill whirring ] Look at that.
Just like you thought.
Nothing attached to it.
Kevin: [ Chuckles ] Heath: So there's a switch that doesn't go to anything at the moment.
The other three are definitely tied in.
We know those went to the existing lights.
Alright.
And if we take a look inside... Oh, yeah, we can see the wires that were probably connected to that old sconce.
So we're going to pull this one out right there and pull that one out right there.
So what I want to do is put a toner on this.
This will emit a signal through the wire and then try and put the receiver on that side, see if we can hear the tone and verify this wire does go to where we think the sconces should be.
[ Tones playing ] So chances are pretty good this goes up the wall across that ceiling, down to one of the sconces, and then back to the other one.
So let's go over to the fireplace and see if they're what we think they are.
Kevin: Okay.
Heath: Alright, Kevin, let's see if this does what we think it does.
So we're going to turn the receiver on.
And just see if we get lucky and we can hear a noise.
[ Tone plays ] There we are.
[ Tone playing ] Right there.
And that's actually right where our plaster box is.
Kevin: Perfect.
Heath: Now, the good news is we found it.
The bad news is, for safety reasons, we can't reuse these wires.
They're just too old and brittle.
So we're going to need to run new ones.
And I don't want to reuse that switch box.
That's so crowded.
I really don't want to add anything else to that.
Is there anywhere else you want to put that switch?
Kevin: Well, what about this?
This is where the wireless switch is now.
Heath: I think it's a great idea and it keeps it in the room, so it makes sense.
You're coming into this room.
You know this switch is controlling something in here.
Kevin: Exactly.
Heath: I like that.
Let's go take a look in the basement and see if we can get to it.
Kevin: Terrific.
Heath: Alright, Kevin.
Kevin: This is what we're faced with.
Heath: Well, this is pretty good.
We've got a nice, accessible basement.
This might be a good thing.
So front door is there coming across.
And right above here is the wall where we're going to install the new switch.
We also have some junction boxes, which is usually the byproduct of -- Did some remodeling?
Kevin: Yeah, we had a kitchen redo a number of years ago and they've done a lot of electrical work.
Heath: And I think that's going to actually benefit us.
When they do that, you ended up not being able to run everything where you want it, so occasionally you need a junction box like this.
And I see a few others.
Might be able to tap off of something there for power, instead of wasting the entire circuit breaker just for the sconces.
Kevin: Oh, that'd be nice.
Heath: So, so far, so good.
So the last thing I want to look at is getting up there for the sconces.
Kevin: Well, this is the chimney that we were looking at upstairs.
Heath: Alright, so this is the fireplace.
This is the face of it here.
We got the beams.
We got a lot of stuff in the way.
We really want to come up on the sides more than on this.
Kevin: Well, if it helps at all, we have another room on the other side of it here that you can check out.
Heath: Oh, good.
Kevin: Maybe it's better access.
Heath: We can access actually get around to get on that side?
Kevin: Yep.
Heath: Let's go do that.
Kevin: Okay.
Heath: Oh, yeah.
Kevin: So this is the space I was talking to you about.
Heath: Got it.
Kevin: And this is the fireplace that we're looking at upstairs.
Heath: And it looks like we've got a few holes in the ceiling already from some work being done.
So I don't think we'll be too bothered by an additional one.
Alright, so this is -- As we face the fireplace, it's going to be the right side, which actually might be a really good thing for us.
Reason being, we should have a full 2x4 wall there that goes up to that arch.
So we might be able to drill up that and get up and kind of wrap around some of the framing, because it should be spaced off the fireplace.
We might get lucky, get a fish up there and just grab that for that first box and then be able to carry over.
Kevin: That would be nice.
Heath: So I kind of like where this is at.
This would be pretty good.
So I think the next step before we go ahead and drill any holes is I want to go upstairs, measure, obviously.
And then I've got a little trick I want to show you being able to find out exactly where we want to drill.
Kevin: Terrific.
Heath: Alright, let's give it a shot.
Kevin: Give it a shot.
♪♪ Heath: We don't have an easy point of reference besides the brick, and we don't know if that's completely continuous the whole way up.
So we want to drill into this wall cavity.
And without having something easy to measure off of, I have a little trick I want to show you.
And it's using this guy.
So, this is just an insulation tie.
If you've ever been down in the basement, you've seen the fiberglass stuff up in the bays.
Kevin: Oh, yeah.
Heath: This is that insulation tie that holds that fiberglass up in those bays.
What I'm actually going to do is use this as a drill bit.
So I'm going to take this.
I'm going to take a pair of cutters.
And I just want to put an angle on it just a little bit.
Cut the end.
Add a good little angle.
Makes it nice and sharp.
Kevin: Yeah.
[ Drill whirs ] Heath: Fits right in a drill chuck.
And then we're simply going to hold it against the baseboard, go down with it, and I'll have you watch for it.
The nice thing is it's super small.
It usually fits in between the cracks of the floorboards.
If there isn't one, just a tiny bit of wax putty fills it right back in.
You won't even notice you had anything happen.
So I'm going to go ahead and drill this.
So if you want to take a walk down there, I'll pop this down and you can let me know when you see it.
Kevin: That's a great trick.
[ Drill whirring ] Yep, I see it.
Heath: Alright, Kevin, how'd we do?
Kevin: Terrific.
Came right down, just as you said it would.
Heath: Perfect.
Kevin: Yep.
Oh, we got a little wiggle room.
That's even better.
So, what we did is I sent that little feeler bit down right up against the baseboard.
So I know the thickness of the baseboard, the thickness of the plaster.
Then we're into the wall framing, which is hopefully 2x4.
So it looks like I have a few inches in there before I hit that floor joist, so I'm going to go right next to that and drill up.
Alright, Kevin, I'm going to move this around.
Let me know if you can hear it in the general area we're going for.
[ Rattling ] Kevin: Yep, I hear it.
Heath: Now I'll drill up into the wall to run the wire to the new light switch.
Alright, Kevin, so we've done all the hard work downstairs.
We've drilled, we've put fishes up, we've proved that we can get up the walls to the sconce area.
We proved that we can get to the switches.
We have a power source.
So everything down there is pretty good.
So we shouldn't have to make any additional holes in the walls with any luck.
Kevin: That would be good.
Heath: Now is the really hard part though.
Where do you want them?
[ Both chuckle ] So what do you think about something like that?
Kevin: Well, I like it, except I'm worried about the height here that we wouldn't be able to put anything on the mantel that would be impeded by that.
So can it go up a little bit higher?
Heath: Yeah.
So right there, that's about where that box was, it looks like, for the old sconce.
Kevin: I like it.
What do you think?
Heath: I think that's pretty good.
I think it's a pretty good starting point.
I'd say let's get that measured up and give it a shot.
Kevin: Excellent.
Heath: Alright.
Now, the reason I'm measuring off of the mantel for each light individually versus going across with a level the whole way, is there's no guarantee in an older home that mantel is perfectly level.
So if I were to use a level and this was off a little bit, we'd see one side higher or lower.
This way you're going to see the sconce is the exact same height off the mantel.
I want to be careful looking for the original boxes, so I'm going to chip the plaster away very gently rather than cutting it with a saw.
♪♪ So it looks like we've got a bunch of old newspaper.
♪♪ And look at that.
Sconce wire.
And we actually have...
It looks like a metal box.
So I think I just want to chip the open of this -- opening of this up one a little more, and we'll see what we're working with.
♪♪ So you can see some of the old newspapers we found, and we actually found the date on one.
Look at that.
1955.
Alright.
So check this out, Kevin.
We actually found the old boxes in the wall still.
Now, this box is able to hold those sconces, but I got to be honest.
I'd feel better about tearing this out, putting it in a box with number eights a little bit bigger.
And the other thing that's going to do is make our life a little easier as far as getting the wire from the basement up to here, and then back over to the other box.
♪♪ Kevin: I got it.
♪♪ Heath: Alright, Kevin, since we got that wire up from the basement already, that's kind of the harder part.
Now we're just going to push this fish behind a couple of studs over to you.
I'm going to tie the wire on and you can pull it right across.
Kevin: I got it.
Back off just a little.
I got it.
Heath: Alright, take that right out.
Kevin: Yep.
Heath: It's a little bit long.
Kevin: I know you said gently before.
Heath: Gently, gently.
Kevin: [ Laughs ] Gently.
Got it.
Heath: Beautiful.
Kevin: Beautiful is right.
Heath: Alright.
♪♪ ♪♪ ♪♪ ♪♪ Alright, Kevin.
So the sconces are in.
The switch is in.
The breaker is back on.
Let's give it a shot.
Kevin: Let's see.
Heath: There you go.
Kevin: Ta-da!
Oh, they look great.
Heath: Doesn't -- Why would someone take those out?
That looks great.
Kevin: No idea.
Heath: Yeah.
I'm happy for you to have them back in place.
Kevin: Thanks.
Heath: I think it's great.
You have that.
You have control of the lamp still.
Nice and clean.
Everything's hardwired, but you are left with a little bit of homework.
I hope you're okay with it.
Old plaster is a little tough sometimes.
We do the best we can trying to cut something in, but sometimes it does chip.
So you can see we did patch up around the holes a little bit.
Not too, too bad.
And same on the little guy over here but a little putty, touch that up, a little bit of paint, I think it'll be good as new.
Kevin: I think I can handle it.
Heath: Alright.
Kevin: Heath, I know it was a lot of work, but it was well worth it, and I love it.
We're going to enjoy it.
Heath: I'm glad you're happy.
And I'm glad to see these back in place.
Kevin: We're very happy.
Thank you very much.
Heath: You're very welcome.
♪♪ Kevin: Next time on "Ask This Old House"... Woman: Welcome to Cape Cod.
Man: Nice to meet you.
Thanks so much for coming.
Jenn: Happy to come down.
Kevin: We head to Cape Cod to build an outdoor shower.
Jenn and Mark team up to tackle the grade, Nathan's going to build the enclosure, and Richard's going to handle the plumbing.
Richard: I only have a few seconds now to get it on.
♪♪ Isn't that cool?
Woman: That's great!
I love it.
Kevin: All that on "Ask This Old House."


Funding for THIS OLD HOUSE is provided by The Home Depot and Renewal By Andersen.